May 19, 2014
After two long flights from Seattle, I arrived in Brisbane for a day and a half of work. I stayed on the Gold Coast and was able to experience the
Tamborine Rainforest Skywalk. I highly recommend it if you find you have an extra day in Brisbane. Once business in Brisbane was concluded, I made the short two hour flight to Melbourne. I settled in for the evening but I didn't get a very restful night of sleep because of my anticipation of getting to experience both
Royal Melbourne Golf Club and
Kingston Heath Golf Club the next day.
After waking and having a good breakfast at the
Marriott Melbourne Hotel buffet, I made my way to Royal Melbourne. If a golf club doesn't have lodging available on site, I have come to prefer Marriott hotels as my first choice because I can always count on what I am getting for the most part. I had allotted myself 90 minutes to arrive due to the morning traffic stories I had heard regarding Melbourne's morning rush hour. It took me approximately 45 minutes to travel from the middle of downtown Melbourne to the golf club with light traffic. I was surprised to find Royal Melbourne in the middle of a residential district with schools on two sides of the facility. From watching tournaments on television, houses are almost never seen. The club has done a fantastic job of concealing the visible residences with a combination well placed trees and shrubs and camera angles.
 |
| Upon arrival to the car park, just across from the entrance of the clubhouse, is the large club sign. |
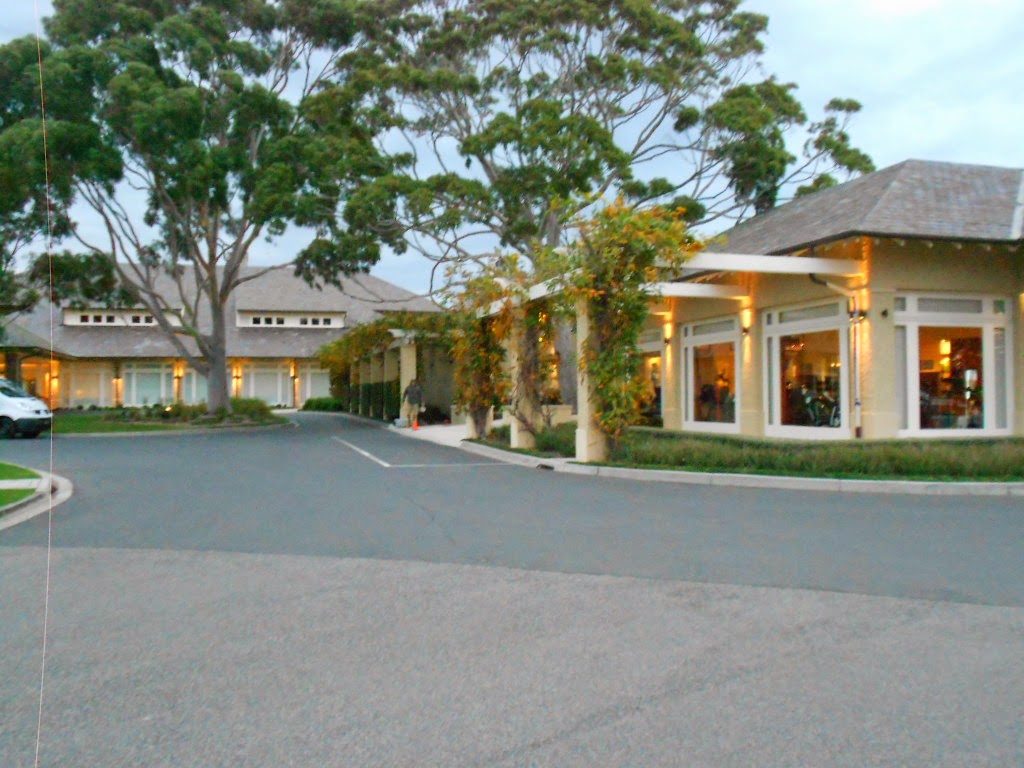 |
| A look at the clubhouse (right) and restaurant (left) from the parking lot. |
A golf course ranked in the top twenty in the world (the west course is) should be a special place and Royal Melbourne holds itself to the highest of standards. My first encounter with the pro shop staff showed me what I could expect of my time at RMGC. Once I had unpacked my clubs from my hard side travel case, my heart sank as I found my driver shaft had been broken where it sat at the top edge of my new
Jones Original Walking Bag, about three fourths the way down towards the hosel. It is definitely not the way I wanted to start out my three week golf trip to Australia, New Zealand, and Singapore, with nine top 100 courses on my schedule.
When I explained my predicament to the lady in the proshop, she immediately called for the head golf professional. Not only did he lend me a Ping G25 driver off their sales floor for both my round at Royal Melbourne in the morning and Kingston Heath later that afternoon, but he also advised he would get in touch with the local Ping rep who lived nearby to see if they could get my Ping G25 driver repaired. I had a
Fujikura Fuel shaft in the driver and I learned the next day when I arrived to play the west course that even though they weren't able to get a Fujikura Fuel shaft the same day, they were able to
Fujikura Blur with very similar qualities. The club did not charge me with any shipping or repair costs. They only charged their cost of the shaft. That is outstanding customer service that went above and beyond and literally salvaged what could have been a very big disappointment for my trip to Australia, New Zealand, and Singapore. After getting that situation sorted out, the staff advised their was a tournmanet on the west course and I would have the east course relatively to myself with only a very few rounds scheduled for it that day. I had 45 minutes before my tee time so decided to explore the clubhouse.
The locker room was fairly simple, with some noteable names found on various lockers. I had been given a security code for my own locker and changed into my golf attire. I had a look around the restaurant and found it a definite must for lunch after my round.
 |
| A look down the gentlemen's locker room from just inside the door. |
After familiarizing myself with the clubhouse, I headed out to the practice facility to hit some balls and get my body ready for walking a round of golf. After exiting the locker room and clubhouse, I found myself next to the practice putting greens and cart paths that lead to each of the courses and practice facility. The first thing that stands out is the large flag pole with national and club flags.
 |
| The flag pole next to the practice green. |
After warming up, I made my way to the east course's first tee. I was greeted on my way there by the marshal, a very friendly gentleman who had been working at the club for approximately 12 months. He gave some tips on several of the holes that had blind tee shots, confirmed I had the course to myself for at least the next 90 minutes or so, and wised me well. Off I went!
There are two courses at Royal Melbourne, an East and a West. The composite course at Royal Melbourne Golf Club is made up of twelve holes from the West course and six holes from the East Course. The composite can only be played in tournaments, thus I played both the East and West courses on separate days.
Alister MacKenzie did the routings of both the East and West courses in the mid 1920s. Club member Alex Russell and superintendent Michael Morcon oversaw the implementation and building of the courses and thus are co-credited with the design since MacKenzie spent only 23 days there.
Like many great designs, the course has wide open fairways that are playable for the average golfer, yet demand the more skilled player drive the ball into dangerous areas of the fairways to get closer to the flags. The scale of Royal Melborne has a “big” feel to it with holes routed around big sand dunes, forced carries over bracken fern, and wide fairways with big doglegs.
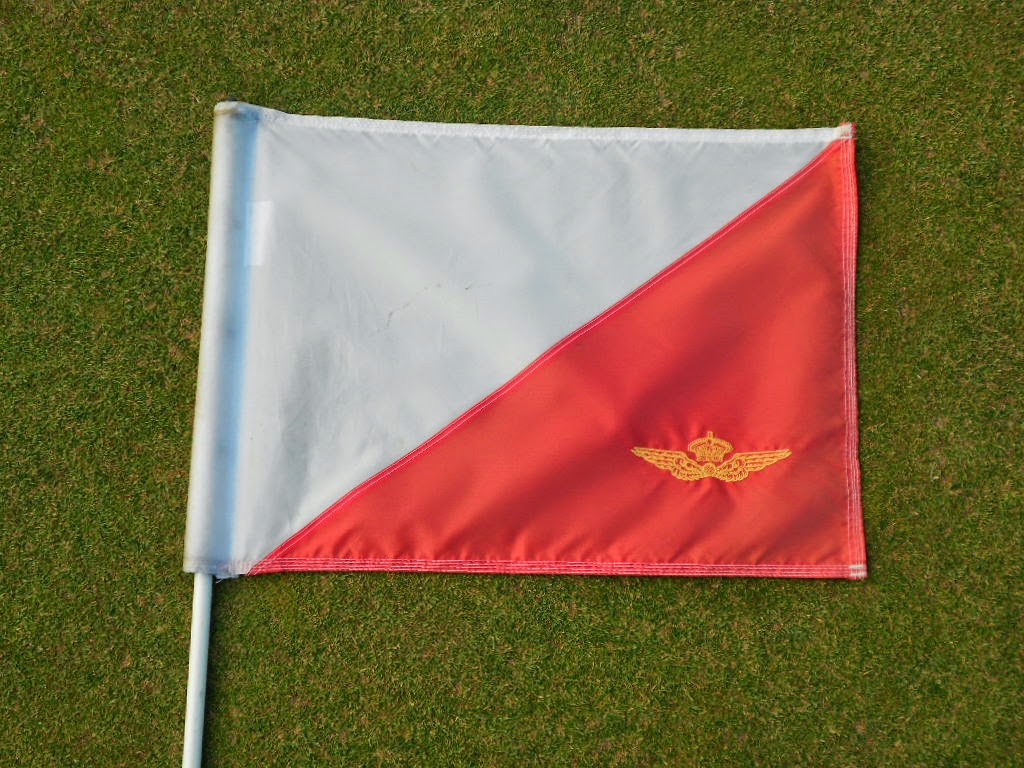 |
| The flag of each hole on the East Course. The West Course has blue instead of red. |
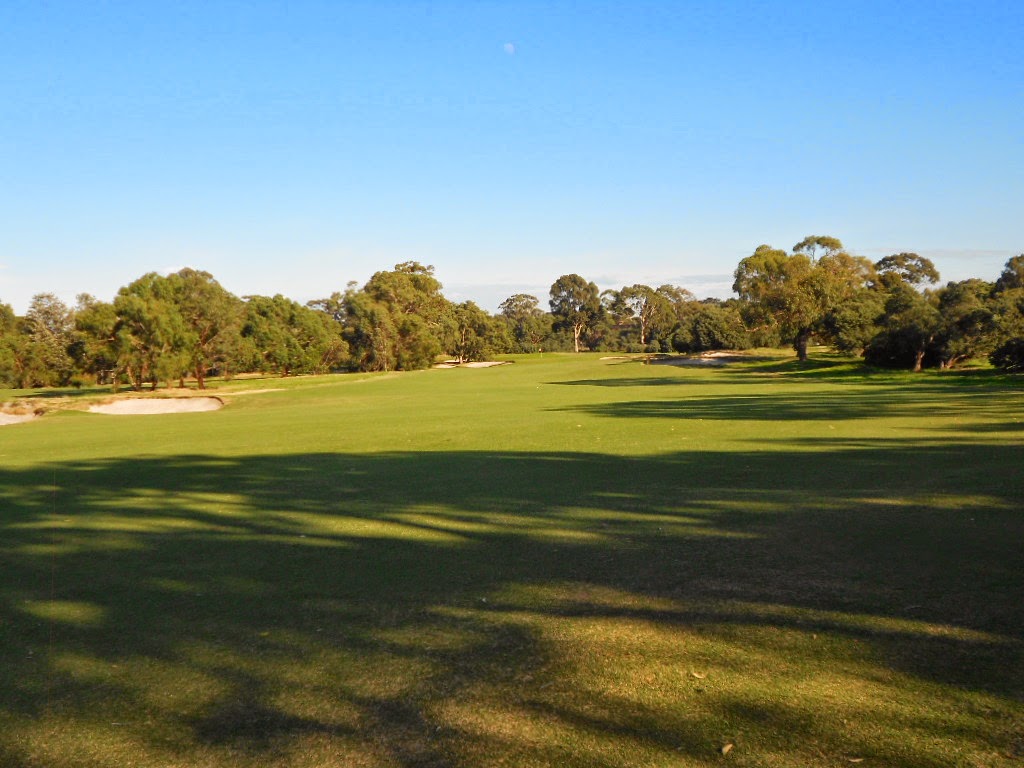
The first hole is a 304 meter, par 4. The best play is to drive to the left or center of the fairway.
 |
| A view down the fairway from the first tee box. |
There is a series of fairway bunkers guarding the right side and a steep hill running into deep rough for tee shots hooked too far left.
 |
| A look into the first green from 150 yards out. |
The small fast-sloping green is stepped and guarded by deep bunkers at the entrance.
 |
| A look into the green from 75 yards out. |
The second tee box sits directly behind the first green (as seen in the photo below). A straight drive is needed to navigate the right dogleg on this 402 meter, par 4.
 |
| A look down the fairway from the second tee box. |
Once you clear the dogleg and make the turn, a hill leads up to the hole. I found that I should have used an extra club than what I thought as my approach shot came up short and rolled back down the hill.
 |
| A look towards the second green from the turn at the dogleg. |
 |
| A look at the green from behind the front right bunker. |
As you can see from the photos above and below, the green is guarded by bunkers along the right fairway and on the left of the green.
 |
| A look at the green from the middle of the front right bunker. |
Each tee box is marked not only by a vertical, white marker, but also by a buried marker plate next to the back tees. Below is a photo of one that I took for this blog.
 |
| The buried ground marker fond next to the back tees at each hole. |
On the 350 meter, par 4 third hole, you have to decide whether to be brave and hit it down to a narrow neck of the fairway or play an iron for safety, fading it off the big gum trees you see from the tee.
 |
| A look down the fairway from the third tee box. |
Once you reach the right turn of the fairway, the green comes into view and is guarded by numerous bunkers, necessitating a straight shot hit to the center of the green.
 |
| A look into the third green from the turn in the fairway approximately 175 yard out. |
The third green is a two-tiered green. On this day, the pin was located on the back tier. Though I hit a good shot to get it back their, the spin I had put on the shot caused it to roll back down, leaving me a tough putt.
 |
| A look into the green from 50 yards out. |
The bunkers were consistent on all of the holes throughout the day. The edges down to the first 12-16 inches were hard packed, and below that mark to the center was heavy sand that required a full swing to get the ball out of it and back into play.
 |
| A look onto the green from the front, right bunker. |
 |
| A look at the green from the fourth tee box. |
The fourth is a relatively short, 184 meter par 3. I decided to use a hybrid of the tee to make sure I stayed up on this elevated green. You definitely want to hit a straight shot to avoid a couple of big bunkers on the left.
 |
| A look onto the 4th green from behind one of the large bunkers. |
The fifth Hole is a short Par 4 measuring at 317 meters. Like many of the holes at Royal Melbourne, it is a blind tee shot. The best play is to the right side of the fairway, towards the roof of the house in front of the cart path. This will allow the ball to run downhill and to the left towards the green.
 |
| A look down at the blind drive from the fifth tee box. |
After a blind drive you require a lofted, well judged short shot to a green that slopes downward to the back of the green.
 |
| After clearing the hill from he drive, you can see the right to left slope leading to the green. |
Your shot does need to be straight as the green is protected on both sides by large bunkers. As the green slopes right to left, the best play is most likely over the left side of the right fairway bunker that will allow the ball to land and roll towards the pin.
 |
| The fifth green follows the slope of the fairway from right to left. |
The sixth Hole is a tricky Par 3, playing to 160 meters. It is surrounded by bunkers that require precise club selection. The green has many deceptive slopes. Be wary of over clubbing because the back half of green slopes sharply down hill.
 |
| A look at the 6th green from the tee box. |
The seventh hole is a long Par 5, playing to 475 meters. Immediately noticeable from the tee box are the large set of bunkers along the right hand side. There are several bunkers on the left but shouldn't come into play as your drive will likely take you past them.
 |
| A look down the fairway from the seventh tee box. |
As mentioned above, hitting your drive to the right hand side can result in a difficult second shot due to the large set of bunkers.
 |
| A look midway down the fairway into the green from 200 yards out. |
The green can be reached in two, given the right conditions. For the best approach to the green, position your second shot down the left half of the fairway, allowing you to avoid the bunkers and play for birdie, or better yet, eagle!
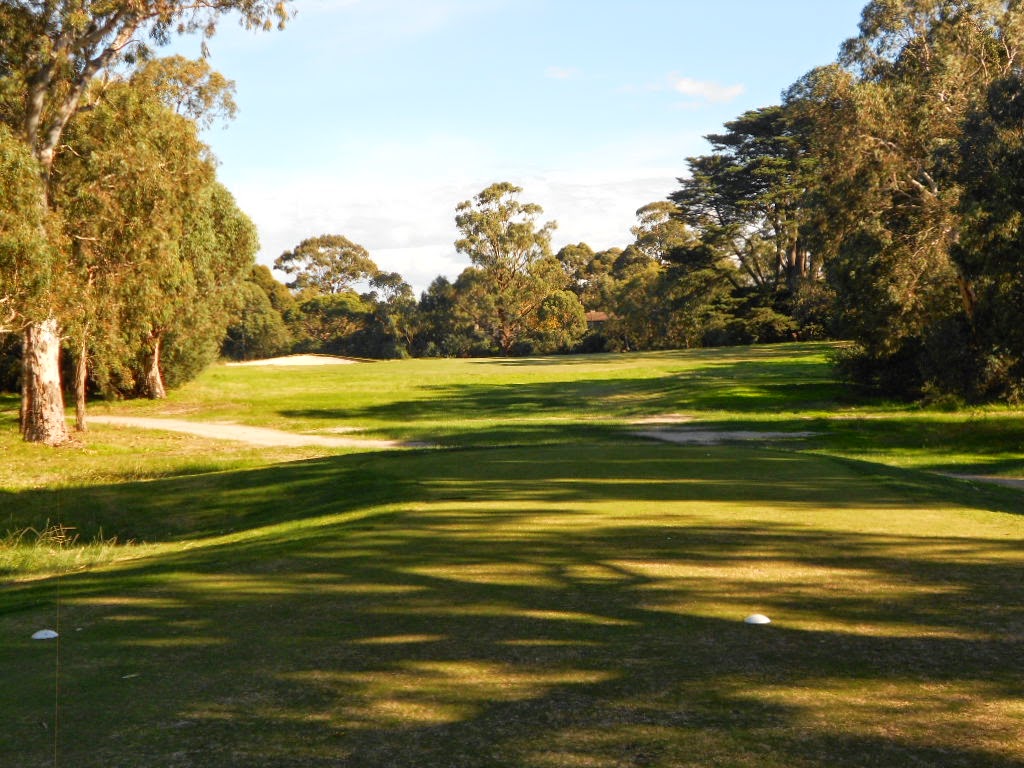
This Par 4 is a long slight dog leg to the left that plays around 400 meters. You want to pay particular attention to the bunkers on the left side of the fairway, as well driving through the fairway on the right.
 |
| A look down the fairway from the eighth tee box. |
 |
| A look into the green from mid-fairway. |
I went into the bunker on the left and had little problem getting a sand save from there. However, when I attempted to hit out of the right side bunkers, it made for a much more difficult shot due to the slope of the green running down hill and away from you. The best advice for this hole is to avoid the bunker on the right side of the green.
 |
| A look into the eighth green from 120 yards out. |
The ninth hole is as difficult as they come on the East Course. The drive is tight down this dogleg right.
 |
| A look down the fairway from the 9th tee box. |
The second shot, that can probably be played with a 8 or 9 iron, is played into a very narrow green, surrounded by difficult bunkers. Straight is always good, especially on this hole.
 |
| A look into the 9th green from 100 yards out. |
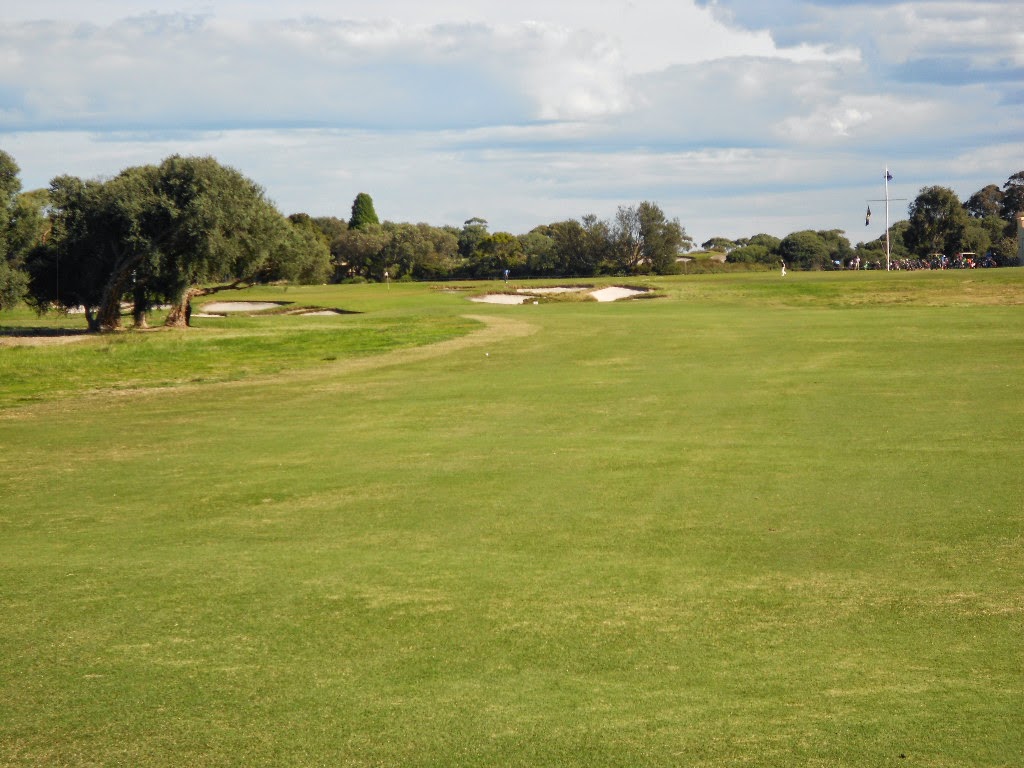
The 10th hole is a par 5 that plays to 457 meters. It is a "split" fairway, where you drive to the first half of the fariway, have some scrub that cuts across the fairway, before finding more short grass and a second part of the fairway leading to the green. There is room on the left for the average handicap golfer to lay up short of the fairway bunkers.
 |
| A look down the fairway from the 10th tee box. |
For better players with a low handicap, they will probably be able to carry the bunkers (pictured below) to set up a long second shot into the two-tiered green. However, if you drive over the bunkers, you have to be careful that your ball doesn't roll out of bounds on the right.
 |
| Just behind the three right-side fairway bunkers, approximately 225 yards out from the green. |
When approaching the green, you want to clear the bunkers and land on the green, especially the large, back right bunker that would be a nightmare to play out of.
 |
| A look into the green from 75 yards out. |
Make sure to try and leave your approach under the hole so you have an easier uphill putt.
 |
| A look into the green from behind the green-side bunkers. |
The 11th hole is a fairly short par 4 playing at 330 meters or so. Again, it is a blind tee shot into a dogleg right.
 |
| A look down the fairway from the 11th tee box. |
Fortunately, a good many of the blind tee shots have a
wide landing zone to give a little relief to players hitting a drive for their first round at Royal Melbourne.
 |
| A look down the fairway from the turn of the dogleg. |
Once you clear the dogleg, you will find you are hitting to a very narrow sloping green, guarded on both sides by green-side bunkers.
 |
| A look into the 11th fairway from 65 yards out. |
The 12th Hole is a long Par 4, playing closer to 420 meters than what the sign notes at 412 meters. Luckily it is a straight hole with no blind tee shot and no dogleg. Just hit it long and straight and you are likely to have a great chance at a birdie. It was one of my three birdies on the day.
 |
| A look down the fairway from the 12th tee box. |
As with many holes at RMGC, there is a risk versus reward decision to make. The green slopes left to right but the left side of the green is guarded by three large bunkers. However, if your shot clears them, and the ball lands softly, it will roll towards the pin. The safer shot is to the right side of the green with a pitch up towards the hole.
 |
| A look into the 12th green from 150 yards out. |
I didn't find the sign board for the 13th hole. It is a par 3 that plays approximately 135 meters. It is one of my favorite holes on the East Course.
 |
| A look into the green from the 13th tee box. |
As you can see below, the green is guarded by a crazy number of bunkers. The only advice I can give is hit the tee shot short right and hope it rolls up and to the left.
 |
| A closer look into the 13th green. |
The 14th hole is a demanding dog-leg Par 4 that plays to 393 meters and requires a precise long iron second shot to an elevated green.
 |
| A look down the fairway from the 14th tee box. |
Once you clear the dogleg, the relatively flat green comes into view.
 |
| A look into the 14th green from 175 yards out. |
The play is definitely to the right. Not only are there no bunkers on the right side of the green, but the green slopes ever so slightly from right to left, but not enough of a slope to effect your putt significantly.
 |
| A look into the 14th green from 75 yards out. |
This short Par 4 plays to only 277 meters. It was another one of my birdies on the day. A good drive down the left side of the fairway will allow you to avoid the right side fairway bunkers.
 |
| A look down the fairway from the 15th tee box. |
The green has a slope throughout the middle making the hole slightly more difficult and likely why it was really assigned a Par 4. You want to make sure to keep left of sand and play a high second shot if there is little to no wind. As you can see below, the green runs predominantly left to right.
 |
| A look into the 15th green from 100 yards out. |
 |
| A look into the green from the 16th tee box. |
The 16th Hole is a Par 3 that plays from 150 meters or so. It has bunkers everywhere. I think I counted seven or eight. There is also a ridge running through the middle of the green, so if you make par, feel good about yourself and whistle a tune as you make your way to 17.
 |
| A different view at the 16th green from the front tee boxes. |
 |
| A look down the fairway from the 17th tee box. |
Guess what? Yep, another blind tee shot. Fortunately, this fairway is relatively straight, rolls down hill a good bit, and has no bunkers until you get down to the green. If you hit it straight, let it rip!
 |
| A look down the fairway after topping the hill that makes it a blind tee shot. |
If you produce a solid drive, you do have to make the decision to go long twice or lay up short and approach with a sand iron. With most, if not all, of the emphasis on the choice of the second shot, it is important to avoid the bunkers if you are going for the green. All the bunkers that matter are on the right, so if you are going for the green, aim to the left front, thought take care of the lone left, green-side bunker.
 |
| A look into the 17th green from 150 yards out. |
I like finishing holes that give a good look at the clubhouse. It always gives me a feeling that I have finally made it home. The fairway turns slightly left towards the green but the corner is easy enough to cut with a solid drive.
 |
| A look down the fairway from the 18th the box. |
 |
| A look into the 18th green after clearing the slight turn left. |
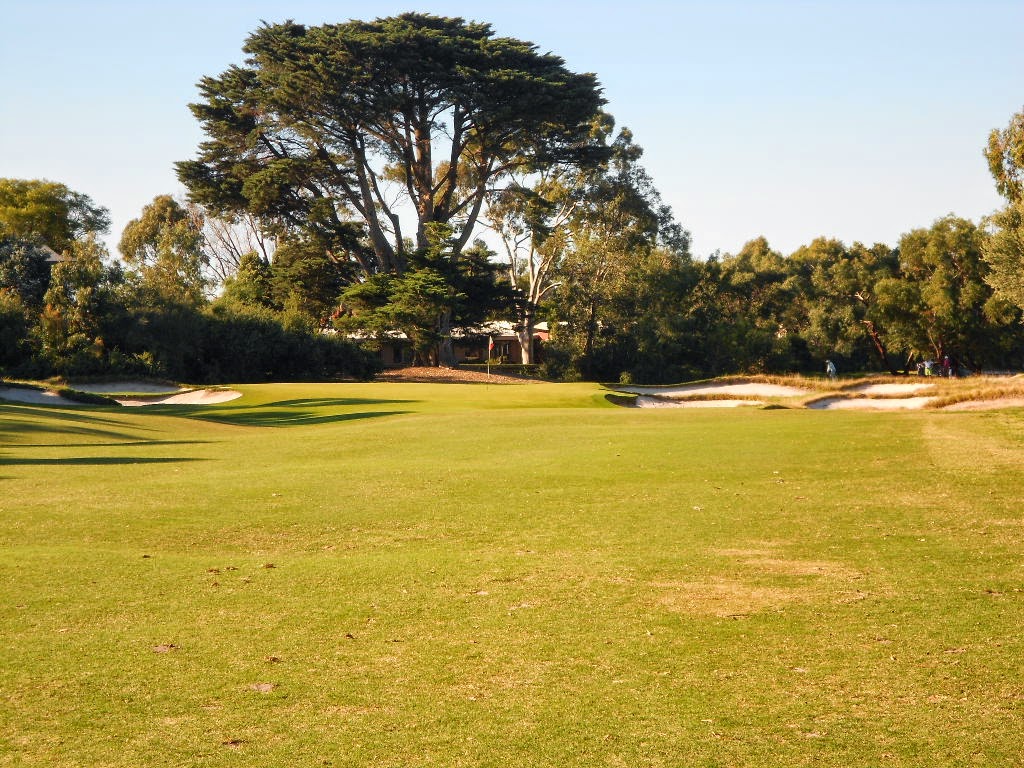
The green is surrounded by traps with some rough in front and the entry is nice and narrow. Also, to the back and right of the green is the practice putting green for both courses. Chances are you are going to have spectators for your final approach shot. I hit the green on my second shot and was greeted with compliments by the second tournament flight that was warming up for their afternoon round.
 |
| The 18th green is almost completely guarded by bunkers. Just hit it straight and you are golden. |
Overall, the East Course at Royal Melbourne lived up to my expectations. It will always be in the shadow of its big brother and for good reason. The West Course is layed out better and is more fun to play. I wish the green's fee was slightly less than the West Course, but I am not going to complain. I felt honored to receive an invitation and enjoyed a round on an almost empty course that stands out as one of the world's top 100.


No comments:
Post a Comment