May 20, 2014
After playing both
Royal Melbourne Golf Club (East) and
Kingston Heath Golf Club the previous day, my legs were feeling it. It has been a long while since I walked two rounds in the same day. If I play two rounds at home, I usually take a riding cart for one of them. It isn't an option at Royal Melbourne, at least not for those capable of walking. But my adrenaline pulled through and I was excited to set out on the highest ranked course in the world I had played to date.
Royal Melbourne West appears in
Fifty Places to Play Golf Before You Die, as well as numerous times throughout
The World's 500 Greatest Golf Holes and receives quite a few accolades. Among them are:
- Hole 6 is listed as one of the top 18 holes in the world.
- Hole 5 is listed as one of the top 100 holes in the world.
- Hole 5 is listed as the best fifth hole of any golf course anywhere on the planet.
- Hole 6 is listed as one of the top 18 most heroic holes in the world.
- Hole 6 is listed as one of the best 18 holes in Australasia and Japan.
- Holes 5 and 6 are both listed as two of Alister MacKenzie's best 18 holes on the planet.
After waking and having another good breakfast at the
Marriott Melbourne Hotel buffet, I made my way to Royal Melbourne. I again allotted myself 90 minutes to arrive due to never wanting to be late as a guest at a private course, or any course for that matter. It took me approximately 35 minutes to travel from the middle of downtown Melbourne to the golf club with very light traffic this day.
 |
| Upon arrival to the car park, just across from the entrance of the clubhouse, is the large club sign. |
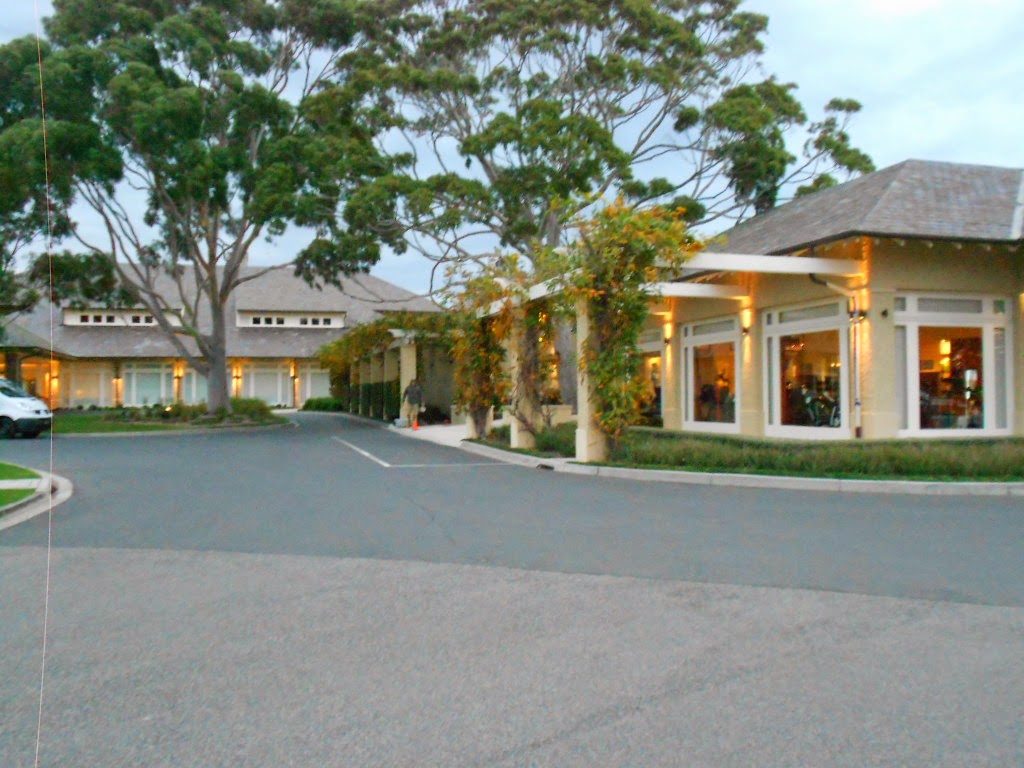 |
| A look at the clubhouse (right) and restaurant (left) from the parking lot. |
As mentioned in my
East Course blog, a golf course ranked in the top twenty in the world (this course is) should be a special place and Royal Melbourne holds itself to the highest of standards. As mentioned in my East Course blog, I had found my driver broken the previous day due to mishandling my the airlines. Upon arrival, I returned the Ping G25 driver I had borrowed to the proshop with much thanks to the staff, and they gave me my Ping G25 driver already fixed. I mentioned it in the East Course blog but it bears repeating here. I had a
Fujikura Fuel shaft in the driver and I learned the next day when I arrived to play the west course that even though they weren't able to get a Fujikura Fuel shaft the same day, they were able to
Fujikura Blur with very similar qualities. The club did not charge me with any shipping or repair costs. They only charged their cost of the shaft. That is outstanding customer service that went above and beyond and literally salvaged what could have been a very big disappointment for my trip to Australia, New Zealand, and Singapore. After getting that situation sorted out, the staff advised their was a tournmanet on the west course and I would have the east course relatively to myself with only a very few rounds scheduled for it that day. I had 45 minutes before my tee time so decided to explore the clubhouse.
I made another visit to the locker room and had been given a new security code for my own locker. I changed into my golf attire, had another look around the restaurant, and found it a definite must for lunch once again after my round.
 |
| A look down the gentlemen's locker room from just inside the door. |
I headed out to the practice facility to hit some balls and get my body ready for walking a round of golf. After exiting the locker room and clubhouse, I found myself next to the practice putting greens and cart paths that lead to each of the courses and practice facility. The first thing that stands out is the large flag pole with national and club flags.
 |
| The flag pole next to the practice green. |
After warming up, I made my way to the West Course's first tee. I was greeted on my way there by the marshal, the same very friendly gentleman who had been working yesterday. He gave some tips on several of the holes that had blind tee shots on this course, and then introduced me to my playing companions for the day, a married couple by the name of Mr. and Mrs. Palmer. My understanding is they are members of the club and were very gracious to allow me to play with them. I much prefer to play with members of a club I am visiting, especially when it is in a different region than my home course, as grass and sand play differently. The Palmers and I hit it off almost immediately, discussing what we each did for work, our families and children, and our love of golf.
For those that haven't read my East Course blog, I will give the same background info about Royal Melbourne here that I wrote there.
There are two courses at Royal Melbourne, an East and a West. The composite course at Royal Melbourne Golf Club is made up of twelve holes from the West course and six holes from the East Course. The composite can only be played in tournaments, thus I played both the East and West courses on separate days.
Alister MacKenzie did the routings of both the East and West courses in the mid 1920s. Club member Alex Russell and superintendent Michael Morcon oversaw the implementation and building of the courses and thus are co-credited with the design since MacKenzie spent only 23 days there.
Like many great designs, the course has wide open fairways that are playable for the average golfer, yet demand the more skilled player drive the ball into dangerous areas of the fairways to get closer to the flags. The scale of Royal Melborne has a “big” feel to it with holes routed around big sand dunes, forced carries over bracken fern, and wide fairways with big doglegs.
 |
| The flag of each hole on the West Course. The East Course has red instead of red. |
The first hole is a good open driving hole, playing 392 meters for a par 4. There is a large landing area, even if you draw or fade your ball, and there are no bunkers that come into play until down around the green. Even with the ample landing room, you do not want to hooked your tee shot as it will likely lead to danger in unplayable trees on the left.
 |
| A look down the fairway from the first tee box. |
A deep trap on the right of the green, plus a grassy mound and deep rough on the left, makes the approach shot tricky. I played my shot left as I did not want to try out a bunker first thing in the morning.
 |
| A look into the first green from 120 yards out. |
The second hole is Par 5 that plays around 439 meters and is a blind tee shot down a dogleg right fairway. As with many holes at Royal Melbourne, this hole offers a risk versus reward option. If you can drive far enough to clear the right-side fairway bunkers, it is definitely the play, leaving a long iron shot into the green. For the average golfer, the play is down the fairway to the left of the fairway bunkers, followed by a wood or hybrid to the green. Keep in mind if you hit too far left, you will find some thick ti-tree or heavy rough.
 |
| A look into the second green from the just past the right-side fairway bunkers. |
This green is a fast-sloping green that runs downhill from back to front. If you have a solid spin on your ball, you want to take care that your ball doesn't roll off the green. There are also green side bunkers on both the front right and left.
 |
| A look into the second green from 50 yards out. |
The Par 4, 324 meter third hole is a very makable birdie hole. The fairway turns left towards the green at approximately 125 meters. It also slopes right to left and a solid drive to the right side of the fairway should have your ball rolling down the fairway towards the green.
 |
| A look down the fairway from the 3rd tee box. |
After clearing the dogleg, the green comes into view and it is apparent it slopes down from left to right. What is not apparent is that it also slopes over the back and it's easy to finish well past the pin. Bunkers on the left are dangerous, but it's an open approach since the right bunker will hardly come into play except for the errant slice.
 |
| A look into the 3rd green from 125 yards out. |
The fourth hole is just cruel. It is a par 4 that plays longer than its 368 meters, the drive is uphill to a blind fairway that doglegs right towards the green.
 |
| A look down the fairway from the 4th tee box. |
If your drive does not clear the hill due to an errant hit or a low drive into the wind, the fairway bunkers loom at the top of the hill. I ended up in these and it was a very difficult second shot. I do not recommend it to anyone.
 |
| A look down the fairway after clearing the hill. |
As seen above, even with a good drive over the hill, the green still isn't in view. The dogleg starts another 120 meters or so after the hill. A long drive will serve you well here as it will roll down the hill and hopefully bring the green into play on your second shot.
 |
| A look into the 4th green from 120 yards out. |
You definitely want your approach to be straight, as there are four bunkers surrounding the green to create even more trouble for your quest to find par.
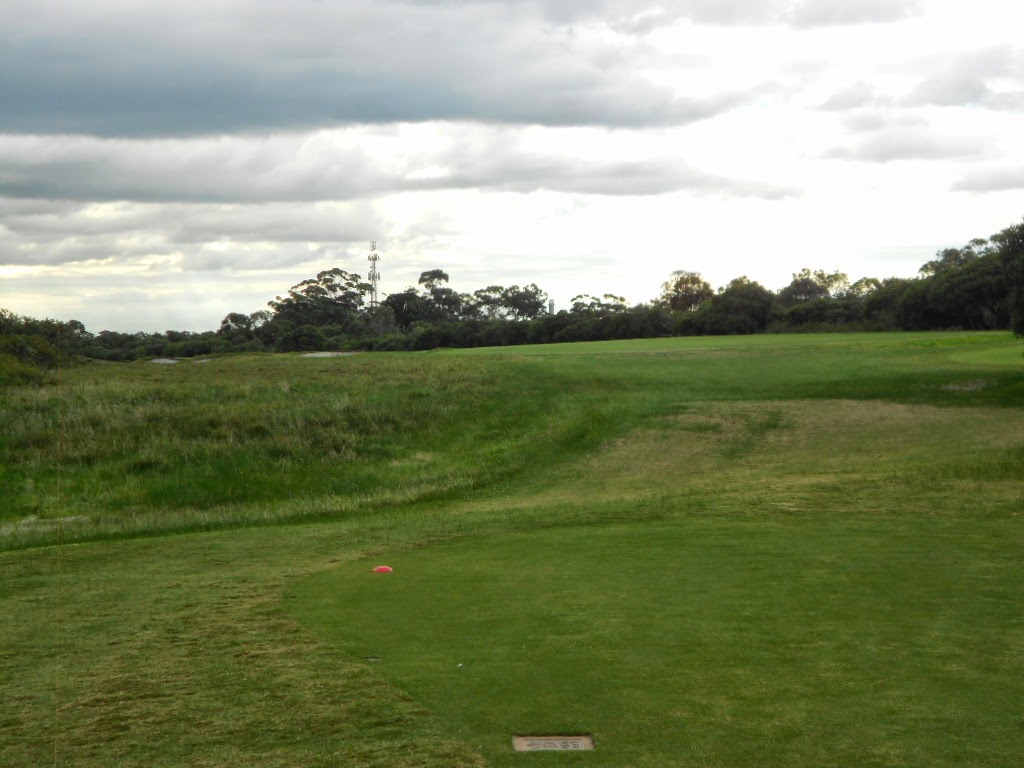
The fifth hole is the first par 3 on the course, playing to around 160 meters, and is one of two signature holes on the West Course.
Accuracy and the right choice of club makes this a superb par three hole. You will need to
cross a valley to the green, heavily fortified with bunkers. The fast green has a steep slope from
front to back and is a tricky test.
 |
| A look into the green from the 5th tee box. |
Hole 6 is the other signature hole on the West Course. It's a par 4 that plays around 390 meters. It is also rated as the most difficult green on the course, the early shots are crucial.
 |
| A look down the fairway from the 6th tee box. |
A sharp dog leg right makes it vital that the tee shot carries a minimum of 200-metres across dense rough and fairway traps, in order to leave the ball in the proper position to try for a green in regulation on your second shot. The elevated green slopes wickedly towards the front and I can see where it would cause many shorter approach shots to roll back down onto the fairway. Unfortunately, long is not a good option either. I went long and to the right into the copse of trees. It took me three shots to get out of the mess and back onto the green, where my ball promptly rolled back down the front of the green and onto the fairway.
 |
| A look into the 6th green from 130 yards out. |
Number 7 is a deceptively easy-looking hole where club selection is vital. The tee shot must be well-placed as you are hitting uphill towards the green, with an elevation change of 50 or so feet. The narrow green and difficult undulations making long putts tough. There are also plenty of bunkers (five or six if I remember correctly) protecting the green, and for those who over-shoot the green, you find yourself with an almost impossibility to salvage par.
 |
| A look up towards the green from the 7th tee box. |
One word for the 8th hole that stands out - bunkers. There are a lot of them There are like 12 of them, with some bunkers being shared with hole #1 from the East Course. Some of the bunkers have grass running in and out, splitting them, really leaving you with 15 or so bunkers. There are a lot.
 |
| A look down the fairway from the 8th tee box. |
The flat green here slopes towards the back left bunkers so the best shot is to hit short of the green and let the ball roll on. I know because I hit my best shot of the day here. From 45 yards out, I chipped just to the edge of the fringe and watched my ball roll right into the cup.
 |
| A look into the 8th green from 45 yards out. |
The 9th hole was one of my favorites. It is a blind tee shot uphill. Once the green comes into view, you still have another 150 or 200 meters of downhill and then back uphill to go, but you can see the green from a long ways away.
 |
| A look up the fairway from the 9th tee box. |
A good long drive will allow your ball to roll a long way downhill, leaving a short iron into the green. You don want to be cautious with the large bunkers on the left. Hitting out of those and uphill to the green makes for an almost impossible shot to stop the ball close to the pin.
 |
| A look into the 9th green from 150 yards out. |
The 10th hole is uphill. It's a short par 4 at 285 meters, but suits the disciplined players who goes the right way around.You drive uphill towards the dogleg left.
 |
| A look down the fairway from the 10th tee box. |
You are left with an approach shot uphill again, to a two-tiered green. A long hitter can attack the pin by cutting the corner. But that's where the danger is, as the sand bunker is huge and a miss can cost numerous strokes. I believe all three of us decided to stay on the right side of the fairway and not tempt fate with that large left bunker.
 |
| A look into the green from 50 yards out. |
Another dog leg awaits at number 11, this time to the right. As is the case with many of the holes on both of the courses at Royal Melbourne, a long hitter can probably fly the fairway bunker and rough on the left and go directly towards the green, allowing the risk to pay off with a reward of a birdie. I can't hit that far so I opted for the safer route and hit to the right side of the fairway, letting my ball roll down hill towards the green.
 |
| A look down the fairway from the 11th tee box. |
 |
| A look into the green at the turn of the dogleg. |
A second shot to a sloping green is a long haul and you have to make sure you hit it straight. There are bunkers guarding the entrance on both the left and right. Once you find yourself in any of those bunkers, you are likely looking at drawing a box around a number on your scorecard.
 |
| A look into the 11th green from 75 yards out. |
You guessed it....another blind tee shot. The 12th is a lengthy fairway which requires a couple of long shots, especially off the tee where some early bunkers await the strong hitter. Luckily, it is fairly straight until the last 50-75 meters, where the green is set off to the left.
 |
| A look down the fairway from the 12th tee box. |
This par five became difficult as we the northerly wind picked up while we were on the tee box. However, once you clear the hill, the ball should land and give you a good roll on the slight downhill.
 |
| A look down the 12th fairway after clearing the hill on the tee shot. |
The approach shot into the green crosses over some rough to the left and one bunker to the right front of the green. Both are trouble and you want to make sure to get over them, even if you go a bit long and roll off the backside of the green.
 |
| A look into the 12th green from 100 yards out. |
I found the par 3, 13th hole a fairly good challenge. It has a pitched green that made it difficult to get close to the pin. It is also guarded by five sand traps making for a very difficult par.
 |
| A look into the green from the 13th tee box. |
The 14th Hole is a very good Par 4, playing at 335 meters. It has an S-shaped fairway that turns right at the end of your drive, travels straight for another 150 meters, and then turns back left towards the green.
 |
| A look down the fairway from the 14th hole |
The 14th green slopes right to left, making it hard to get close to the pin. It is also guarded by 10-12 different sized sand traps, making this a very difficult hole to par.
 |
| A look into the 14th green from 100 yards out. |
The 15th Hole is a short but tricky Par 5 that plays to around 427 meters. It is a long straight drive with a few fairway bunkers on either side. The drive will likely come up 50-100 yards short of a scrub brush area that crosses the fairway.
 |
| A look down the fairway from the 15th tee box. |
Once your drive comes to a stop, you have a decision to make depending on how far you drove the ball. The scrub brush that crosses the fairway can cost you 4-5 strokes if you get into it. Luckily, it is a short par 5, so laying up is not a bad option that will still allow you to make par.
The green slopes sharply to the front so you want to make sure your ball lands on the backside of the green, taking care to make sure it doesn't end up in the back right bunker.
 |
| A look into the 15th green from 125 yards out. |
The 16th hole is an extremely tough Par 3, playing to 202 meters on a slight uphill. It has extensive bunkers and a rather small green. With the wind blowing towards us, I used a hybrid and still came up short. Definitely go down a club or two if the wind is picking up so you can reach the green.
 |
| A look into the green from the 16th tee box. |
Again two long shots are required on this par 4, 401 meter, dogleg left. The drive will likely pass some bunkers on the left-hand side of the fairway. It's a tight driving hole and the second shot needs a wood or long iron to an elevated green. Dangerous traps on the right make for a straight approach
 |
| A look down the fairway from the 17th tee box. |
Once you have cleared the fairway bunkers with a straight drive and turned the corner of the dogleg, it is a relatively straight shot into the green. There are bunkers to the far right that shouldn't come into play except when a slice is hit.
 |
| Looking into the 17th green from 150 yards out. |
The final hole of the round is another risk versus reward hole, that ingrains how many times you've seen it in the previous 17 holes. You can play it safe and to the left, but will have very long second shot for a green in regulation. The other choice is to drive your ball more than 200 meters over the left side of the bunkers so it can roll down the hill, leaving a mid to short iron into the green. If you have a low trajectory drive, you are likely going to end up in the bunkers if you try to go over them.
 |
| A look down the fairway from the 18th tee box. |
After clearing the bunkers, you will find the fairway dog-legs to the right to present an approach shot from a downhill lie. The green looks awesome, well-protected by bunkers, but a good iron lobbed to the center of the green will pay dividends.
 |
| A look into the 18th green from 150 yards out. |
Overall, I had a tremendous time playing the West Course. It was a round made better by the company of my playing companions. After the round, Mr. and Mrs. Palmer invited me to lunch in the restaurant at Royal Melbourne. They treated me to lunch, paying for it, and sharing great conversation. They even let me in on the secret of the outstanding scones provided by the club. I hope to return to Melbourne soon so that I may repay the favor and treat both of them to lunch or dinner, and hope to provide as good company for them as they did for me on my visit to this very nice club.


No comments:
Post a Comment